
Creating an off-grid outdoor shower can transform your backyard or campsite into a refreshing oasis. Whether you prefer the convenience of a freestanding solar shower or the satisfaction of building your own, this guide covers everything you need to know.

From choosing the right features to step-by-step installation, here’s how to get started.
Features to Look for in Outdoor Solar Heated Showers
When selecting an outdoor solar heated shower, prioritize the following features for the best experience:
- Water Capacity: Ensure the tank is large enough to provide sufficient water for multiple showers. A typical capacity ranges from 5 to 10 gallons.
- Material Durability: Look for UV-resistant, rust-proof materials such as PVC or stainless steel to withstand outdoor conditions.
- Temperature Control: Adjustable nozzles and temperature settings allow for a more comfortable showering experience.
- Portability: Lightweight and easy-to-move designs are ideal for campsites or seasonal use.
- Easy Installation: Opt for models that require minimal tools and setup time, enhancing convenience.

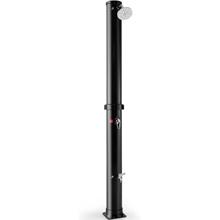
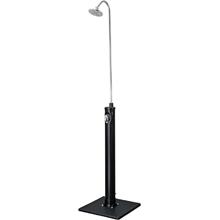
Freestanding Solar Showers vs. Building Your Own
Freestanding:
- Convenience: These models are ready to use out of the box with minimal assembly.
- Portability: Easily move them around your yard or take them to different locations.
- Cost: Prices typically range from $50 to $200, depending on features and capacity.
- Design: Often sleek and stylish, they can complement your outdoor decor.
Building Your Own:
- Customization: Tailor the design, size and features to meet your specific needs.
- Satisfaction: Enjoy the hands-on experience and pride of a DIY project.
- Cost: Potentially lower if using recycled materials, but can vary widely.
- Durability: With quality materials, a custom-built shower can be more robust and long-lasting.

Step-by-Step DIY Guide to Building an Off-Grid Outdoor Shower
Choose a Location
- Sunny Spot: Select a location that receives ample sunlight throughout the day. This ensures the black water tank can efficiently absorb heat, providing warm water for your showers. For example, an open area away from trees or buildings that cast shadows is ideal.
- Drainage: Ensure the site has good drainage to prevent water from pooling. A slight slope can help direct water away from the shower area. Alternatively, you can dig a shallow trench leading away from the shower base to facilitate water flow.
Gather Materials
- Water Tank: A 5 to 10-gallon black water tank works well for solar heating. Black absorbs heat efficiently, heating the water inside. For example, a black PVC or HDPE tank is durable and UV-resistant.
- PVC Pipes and Fittings: These will connect your water tank to the showerhead. Ensure you have the right connectors, elbows and T-joints for your design.
- Showerhead: Choose a showerhead designed for outdoor use. Look for adjustable spray patterns for a more comfortable shower experience.
- Hose or Water Source Connection: You’ll need a way to fill your water tank. A standard garden hose with a compatible connection works well.
- Wooden Platform or Base: Construct a sturdy platform to support the water tank and provide a stable footing for the shower. Pressure-treated wood or a composite material resistant to water damage is ideal.
- Waterproof Sealant: Use this to secure all connections and prevent leaks, ensuring a reliable and durable setup.
Build the Base
- Construct the Platform: Use wood or other sturdy materials to build a platform. Make sure it’s level and can support the weight of the filled water tank. For instance, a platform measuring 3×3 feet with reinforced cross beams provides ample stability.
- Stabilize: Anchor the platform to the ground if necessary, especially in windy areas, to prevent tipping.
Install the Water Tank
- Position the Tank: Secure the black water tank on the platform in the sunny location you’ve chosen. Ensure it’s stable and won’t move easily.
- Connect to Showerhead: Use PVC pipes to connect the bottom of the tank to the showerhead. Ensure the pipe runs vertically up to the desired showerhead height.
- Seal Connections: Apply waterproof sealant to all pipe joints and connectors to prevent leaks. For example, silicone-based sealants work well and are easy to apply.
Set Up the Shower Area
- Attach the Showerhead: Mount the showerhead to a vertical pipe or a wall mount, ensuring it’s at a comfortable height for use. A height of about 7 feet from the ground is typical.
- Privacy Screen: Create a privacy screen around your shower area. Use materials like a tarp, bamboo fencing or even a portable camping shower enclosure. Secure the screen with stakes or tie it to nearby structures.
- Drainage Solution: Add a drainage solution to manage wastewater. A gravel bed under the shower can help with drainage or you can install a catch basin connected to a garden hose to direct water away from the area.
Test & Adjust
- Fill the tank with water and allow it to heat in the sun.
- Test the water temperature and adjust the showerhead or tank position as needed
Cost Considerations
Setting up an off-grid outdoor shower can be budget-friendly or more elaborate, depending on your choices:
- Freestanding Solar Showers: Expect to spend between $100 and $200.
- DIY Solar Showers: Costs can range from $30 to $300 and up, depending on materials used and complexity of the design.
The Bottom Line:
Creating an off-grid outdoor shower enhances your outdoor space. Choose a freestanding model or build your own for a refreshing, eco-friendly addition to your yard or campsite. With the right setup, enjoy the luxury of a solar-heated shower, off the grid and immersed in nature.
Last Updated June 23, 2024